Requirement for the integration: Global embed code
Neocom requires a Javascript file to be loaded on all pages of a website. Add the following script to the root of your shop system website or via Google Tag Manager so that it's loaded on every page. This script contains an identifier (Client Id) for your account, which you can get in the Admin Portal | Projects | Setup | Integration. This will make sure that the page will successfully be able to call Neocom when needed.
<script async src="https://production.neocomapp.com/neocom.js?id=[YOUR_CLIENT_ID]"></script>
Overview
-
Option 1: Advisor Prompt Integration
-
Option 2: Javascript Trigger Integration
-
Option 3: Inline Advisor Integration
Option 1: Advisor prompt integration
With this method, you can enable a slide in or modal to launch the advisor from any webpage you want. Your customers can directly start the advisor or close the pop-up. You can define the triggers for the pop-up, the design and the URLs. There are three different types of prompt, text, graphic or video. Please find more details here.
This is a very effective way to create an entry point into the advisor without changing your website’s current layout.
💡 Please note that the prompt integration can only be used if the global embed code is integrated.
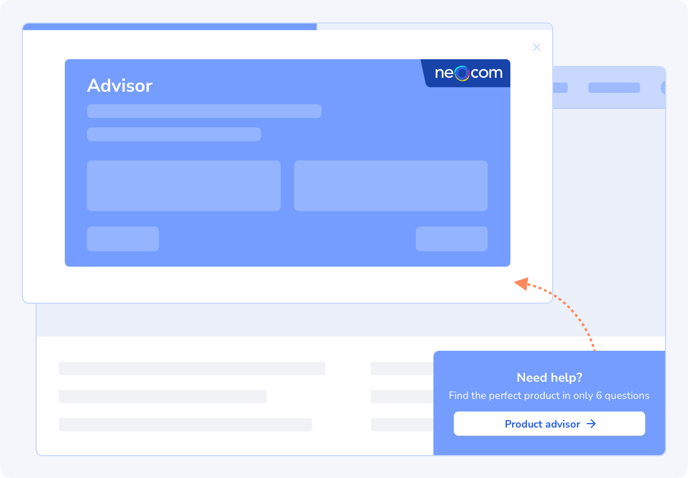
What is a slide in?
A slide in is a small image which will slide into the website from the bottom of your webpage and then prompts the website visitor to try your advisor.
How a slide in works
When you activate the advisor prompt in the Neocom Admin Portal via the active/ inactive toggle, the text prompt appears with predefined default settings. You can customize the prompt by clicking edit prompt.
Option 2: Javascript trigger integration
You can launch the advisor from any element on your website, with this simple method. It can be a button, an image, a banner or any other element. When your website user clicks on this element, the advisor will be launched. All you need to do is add a callback function to the element, like in the example code below.
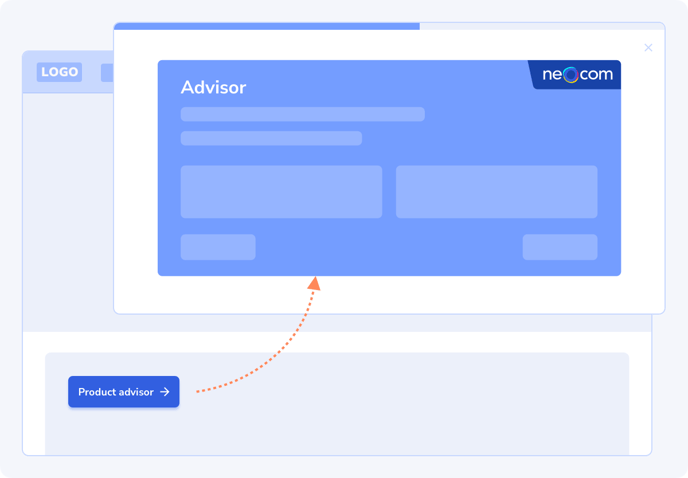
The following code uses a button as an example:
<button onclick="Neocom.openAdvisorInModal('YOUR_PROJECT_ID')">Open Advisor</button>
Note: The ID in this code differs from the one in the global embed code mentioned above. The global embed code includes the Client ID, whereas here you need the Project ID, which you can find in your scripts in the Admin Portal | Projects | Setup |Integration.
Option 3: Inline advisor integration
Use this method if you want to embed the advisor in a certain section of a webpage. You can choose to create a standalone page for the advisor, or embed the advisor in an already existing webpage. For more details, click here.
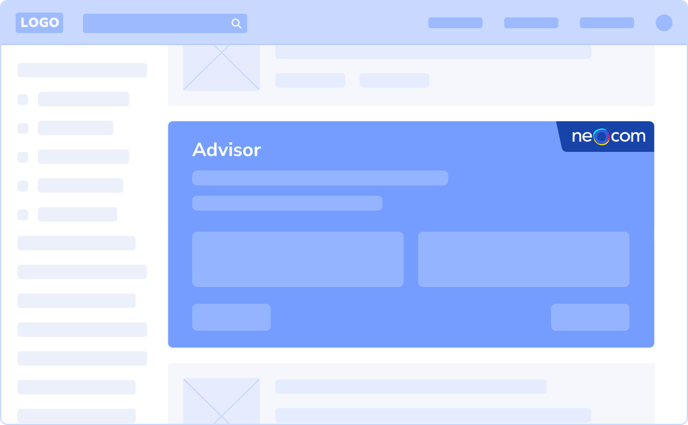
To do so, simply insert this code in the page where you would like the advisor to be placed:
<div data-neocom-id="YOUR_PROJECT_ID"></div>
Note: The ID in this code differs from the one in the global embed code mentioned above. The global embed code includes the Client ID, whereas here you need the Project ID, which you can find in your scripts in the Admin Portal | Projects | Setup |Integration.
For any of the implementation methods, it's essential to have the global embed code to be in place beforehand.
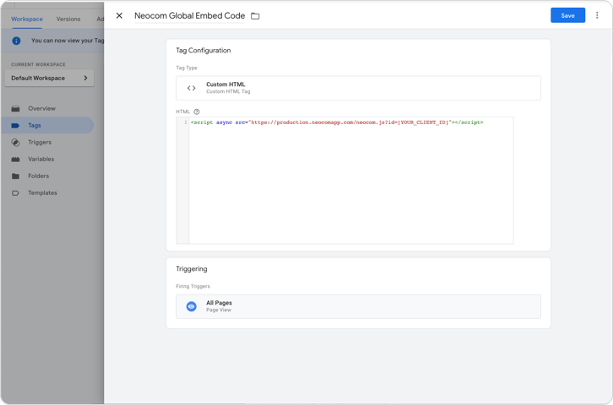
Global Embed Code via Google Tag Manager
To integrate the Global Embed Code via Google Tag Manager the following steps are needed.
- Create new Tag
- Tag Type HTML
- Insert Global Embed Code (you can get it in Admin Portal | Projects | Setup |Integration)
- Trigger All Pages
- Save and Submit