Setup | Results | Result Card Tags
Enhance the Shopping Experience and Boost Sales with Clear Product Information Directly on the Result Card
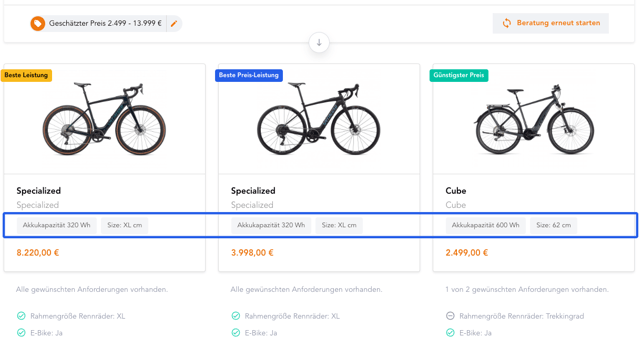
Result Card Tags provide a quick overview of key product features directly on the result card, making it easier for your customers to make informed purchase decisions by displaying all relevant information clearly.
Content:

Position
You can find the settings for Result Card Tags under Projects | Setup | Results | Result Card Tags. Navigate to the Setup section via the main navigation, then select “Results” from the left menu. Scroll down to “Result Card Tags” and click on “Edit tags” to open the menu.

Usage
When creating new Result Card Tags, there are two main decisions to consider:
-
Important Information: Think about which product features will best support your customers in their purchasing decisions. Highlight the most important features without overwhelming them.
-
Data Sources: Determine which attributes in your data feed best represent these features. Tags can apply to specific products (e.g., discounted items) or to all items (e.g., size, color).
Setup
Once you've decided on the necessary tags, you can create them:
- Add Tag: Click on “Add Tag.” To edit an existing tag, use the three dots on the right side of the window.

- Static Title or Attribute Title: Choose between a Static Title, which remains constant (e.g., “Free Shipping”), and an Attribute Title, which dynamically pulls information from the feed (e.g., size, material).

- Static Title: When setting up a Static Title, first define the text that will appear on the Result Card Tag. This text will remain unchanged for all assigned products. You can also adjust the text and background color to highlight the title more effectively or to align with your brand guidelines. This visual customization helps emphasize key features. Once all settings are configured, save them by clicking “Save.”

- Attribute Title: An Attribute Title dynamically adapts to the information in the data feed. To create an Attribute Title, first select the attribute you want to highlight. You can then add a prefix and/or suffix to clarify the attribute's meaning. For example, using “Size” as a prefix and “cm” as a suffix clearly indicates the product's dimensions in centimeters. These customizations allow you to make specific product features directly visible. After completing the settings, save them with “Save.”

- Static Title: When setting up a Static Title, first define the text that will appear on the Result Card Tag. This text will remain unchanged for all assigned products. You can also adjust the text and background color to highlight the title more effectively or to align with your brand guidelines. This visual customization helps emphasize key features. Once all settings are configured, save them by clicking “Save.”
- Mapping: In the Mapping step, you define which products will display the specified title or attribute. Here, you can set specific conditions, similar to the mapping of answers. You can choose whether a tag should only be displayed on certain products, such as discounted items, or applied to all products that possess a particular attribute.

A useful feature is the “NOT EMPTY” condition, which applies the tag to all products that contain the selected attribute. Conversely, with “EMPTY,” you can apply the tag to products that do not have the attribute.
Once the mapping is completed and saved, a green bar will indicate the number of products on which the tag is visible. Review your changes in the preview and publish the new settings to activate them in the live version of your advisor.